Sunday, December 22, 2013

Vintage Fan Ripple Stitch Baby Blanket

This blanket is a gift for a cousin and his wife who are expecting their second child in March-- how exciting!


For this blanket, I was inspired by a beautiful, multi-colored blanket that I saw on Chiaki Creates. Thankfully, the blogger included a link to the original pattern from Ravelry called the Vintage Fan Ripple Stitch pattern.

I used a size H crochet hook.  For yarn, I used one skein each of Red Heart Super Saver in Soft White and Turqua-- 364 yards per skein.


This pattern begins with a chain in multiples of 9, plus 1 extra chain.  For every 9 chains, you will get 1 fan. I started with a chain of 127 to make this blanket 14 fans wide.

The stitch is very unique yet easy to follow.  I'll warn you, though, it's not one of those "mindless" stitches-- you'll be counting and paying attention the whole time.  Something else interesting about this pattern:  because the stitches are made through the back loops only, it creates a slightly different look on each side of the blanket.

Front


Back

The pattern involves creating 3 ripple rows followed by 1 fan row (what I will call a "set"), and then repeating these steps.  To create the striped look, I switched colors after each set.  To finish, I continued with blue yarn to stitch the final 3 rows/edging.

Altogether, the blanket measures about 36 inches wide and 30 inches long.  It feels very soft and thick-- perfect for snuggling!


I hope this gives you some ideas for your next project.  Happy hooking!

Jilliane


Are you on Pinterest?  Follow my latest handiwork or crochet inspiration board!  

Ripple Stitch Baby Blanket

This blanket is a gift for one of my adorable second cousins, Aiden, who will soon be a big brother to the recipient of the Vintage Fan Ripple Stitch blanket.


I was inspired by the color pattern of two blankets-- one on Etsy and one on the Rainbow blog. Both involved varying the thickness of the stripes, which I thought was a pretty cool look.


I followed the Crochet Crowd's video tutorial for the wave/ripple stitch as I have for past projects, like the Cascading Pink Ripple Stitch Baby Blanket.


I used a size H crochet hook and the following yarns:
- Red Heart Super Saver, Aran (beige), 744 yards
- Red Heart with Love, Mango, 370 yards
- Red Heart with Love, Berry Red, 370 yards

The color pattern was as follows:  beige, mango, beige, mango, beige, berry, berry... and repeat.


To finish, I edged the blanket in beige.  This involved creating half double crochet stitches along both straight sides, followed by a row of single crochet stitches around the entire blanket.  As I did with the Cascading Pink Ripple Stitch Baby Blanket, I started the final row in the nook of a ripple to help hide it better.


This blanket turned out really cute and measures 45 inches by 36 inches-- a great size for a toddler.

I hope this gives you some inspiration... Happy hooking!

Jilliane


Are you on Pinterest?  Follow my latest handiwork or crochet inspiration board!  

Never-Ending Granny Square Blanket

This was a fun project for our niece, Isabella, who I hope will love to cuddle with her new blanket.


I followed The Crochet Crowd's video tutorial for the Never Ending Granny Square.  I used a size H crochet hook and 1-1/2 skeins each of following Red Heart Super Saver yarns:  Soft White, Perfect Pink, and Glowworm.


About 22 minutes into the video tutorial, the instructor talks about splitting one of the shells.  For that shell, I decided to crochet four double crochet stitches, so that it wouldn't be noticeable that one of the double crochets was covered up by the next color yarn.


For edging, I did a single crochet stitch all the way around the blanket.  I crocheted three single crochets into the top of each shell and one single crochet around the yarn in the spaces between shells.

Altogether, the blanket measures 38 inches by 37 inches.  As the video instructor said, this blanket isn't perfectly square because of the "never-ending" aspect of the pattern.  If you study it real hard, the center looks a little cockeyed but honestly-- it's not too noticeable.


Hope this gives you some inspiration for a new project.  Happy hooking!


Jilliane


Are you on Pinterest?  Follow my latest handiwork or crochet inspiration board!  

Monday, December 16, 2013

Thick & Quick Steelers Blanket

This will be a great Christmas gift for our nephew, Asa, who is a big Steelers fan like the rest of his family!


Once again, I followed the Chunky Crochet Baby Blanket Tutorial, just as I have with past projects like the Thick Striped Baby Blanket and the Thick and Quick Baby Blanket.


I used a size L crochet hook and the following yarn:
- Red Heart Super Saver, Zebra, 244 yards (4 skeins)
- Red Heart Super Saver, Bright Yellow, 362 yards (2-1/2 skeins)   

The "zebra" yarn was a blend of black, grey, and white which created this neat pattern with no effort at all.


Altogether, the blanket measures 52 inches by 32 inches and is a great size for a child-size bed.

Hope this gives you some inspiration... Happy hooking!

Jilliane                                                                        


Are you on Pinterest?  Follow my latest handiwork or crochet inspiration board!  

Saturday, November 23, 2013

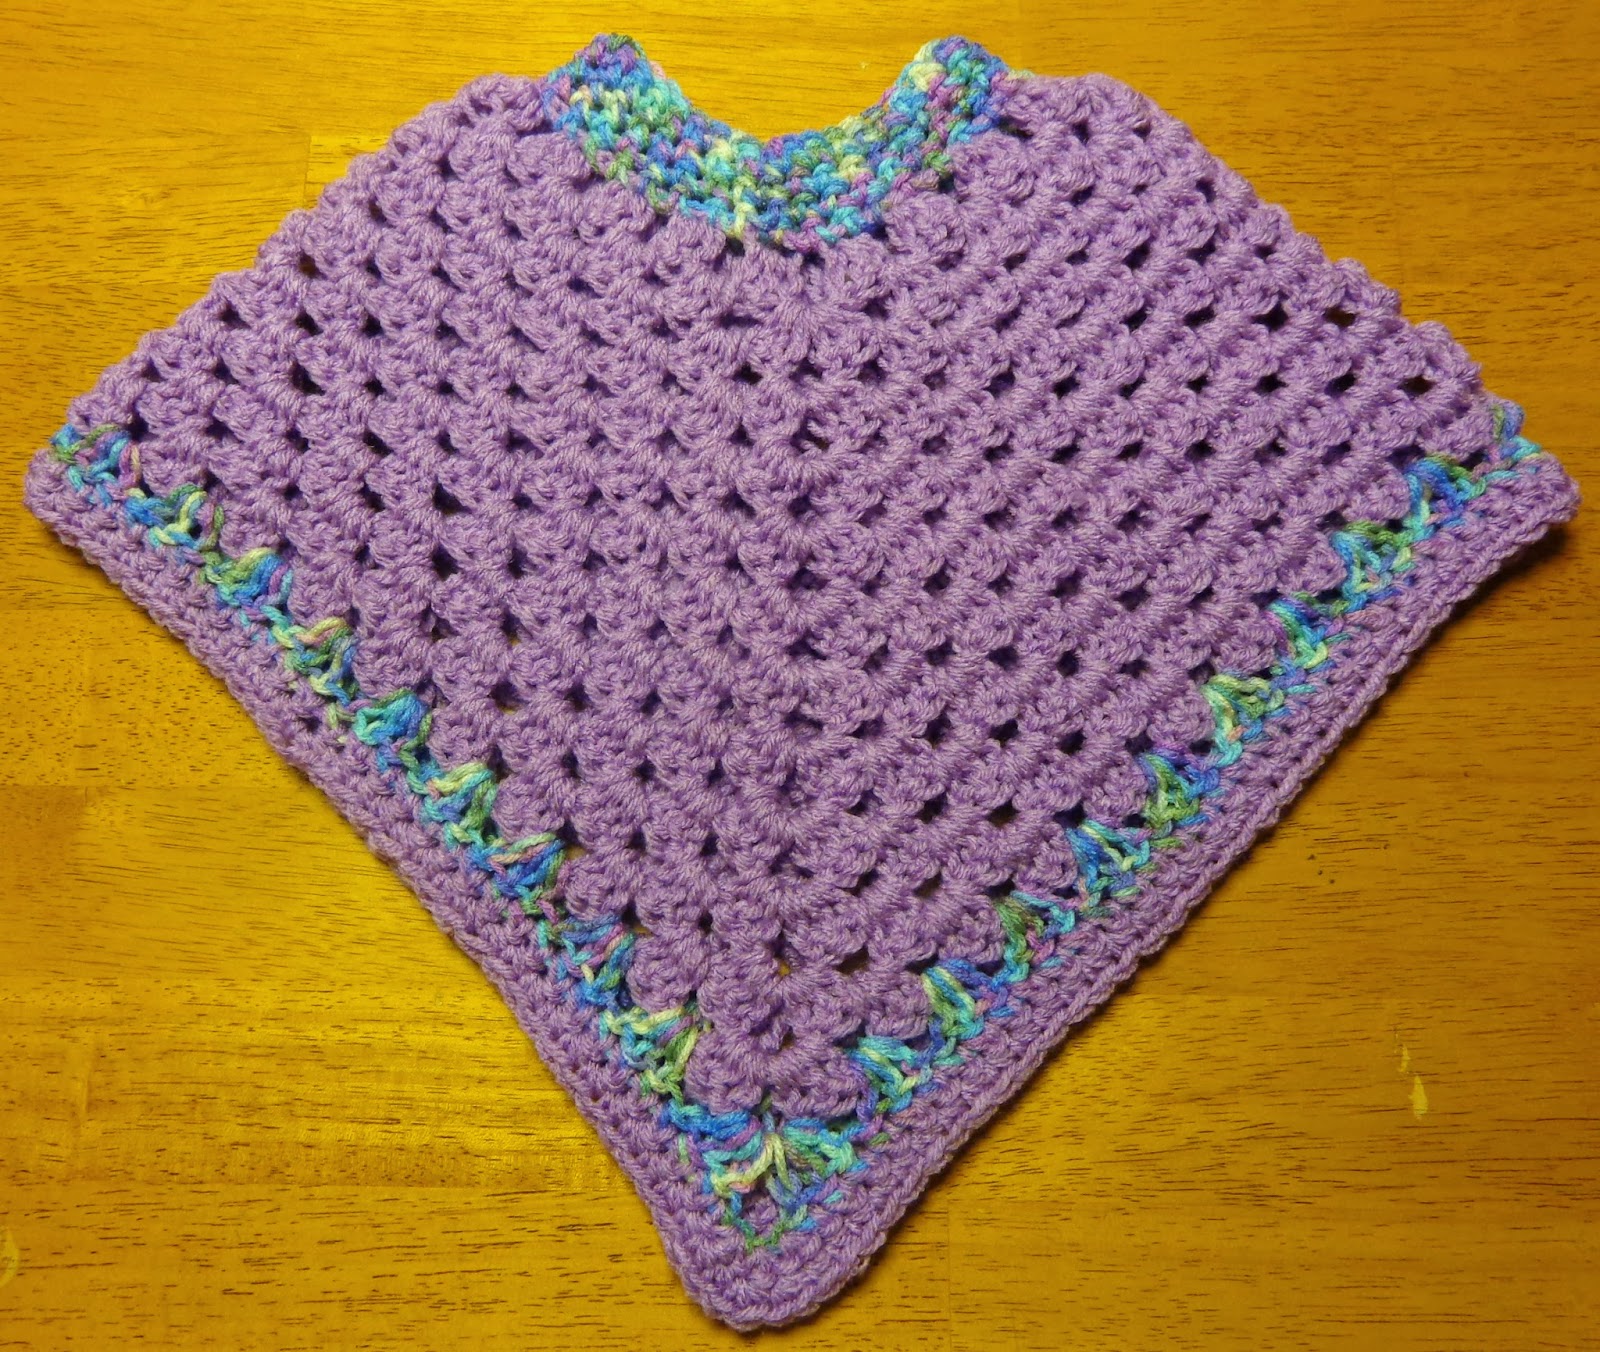
Simple Child's Poncho

This poncho is so sweet and will be a great Christmas gift for my adorable niece, Laurina.


I followed the Child Coming Home Poncho pattern by Lion Brand Yarns.  I've used this pattern once before to make a Pink/Multi Poncho for another niece-- the big sister to this poncho's recipient, actually!  This pattern is very easy to follow and is available in three sizes.


I used a size K crochet hook and Red Heart Super Saver yarn in Orchid (about 1/2 skein) and Monet (just enough for the collar and edging).  To get started, I followed the size 4 pattern, but did a slight variation to make this poncho look different from the other one.  


Variation:
The pattern called for 10 rows of the block stitch, followed by 4 rows of the shell edging. Instead, I crocheted 13 rows of the block stitch (12 rows in Orchid and 1 row in Monet), then I finished with 2 rows of single crochet stitch in Orchid.  Finally, I used the Monet yarn for the collar.


The finished product is 14-1/2 inches long and 19 inches wide, and the collar measures 15 inches around (although, it stretches wider).


Hope this gives you some new ideas for your next crochet project.  Happy stitching!

Jilliane


Are you on Pinterest?  Follow my latest handiwork or crochet inspiration board!  

Monday, November 18, 2013

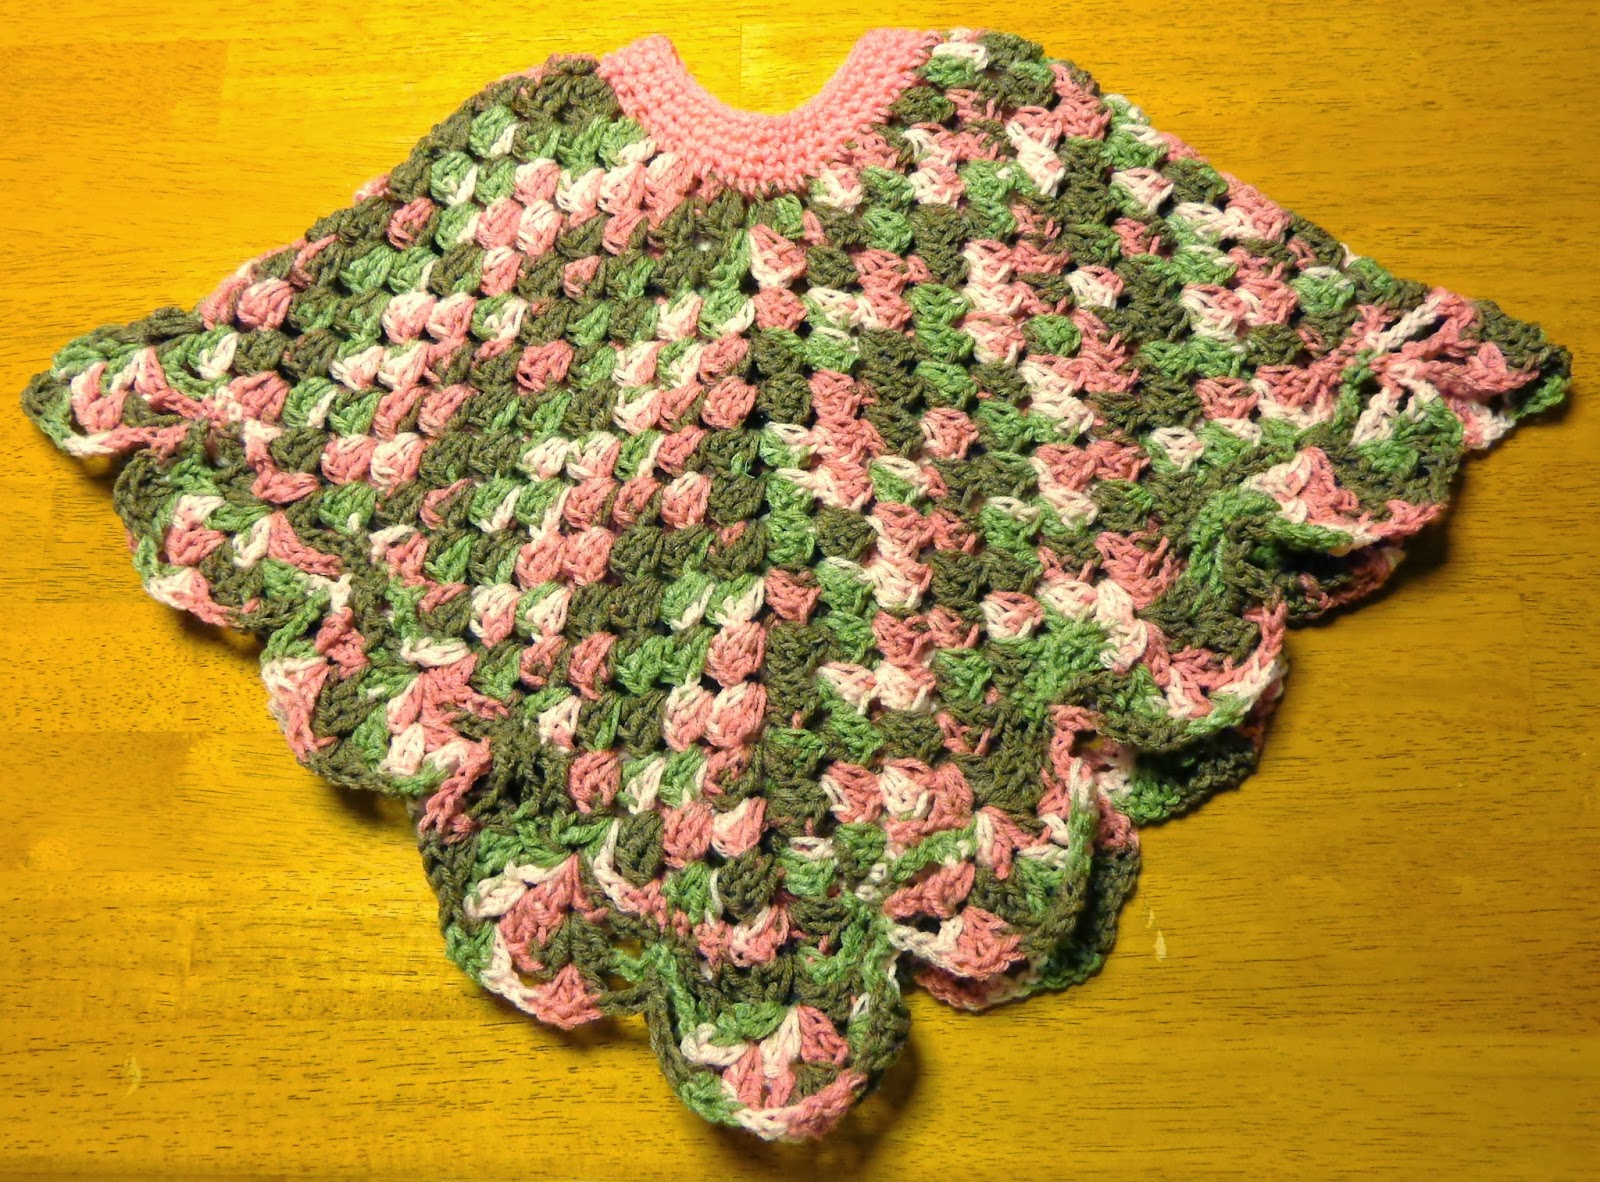
Child's Poncho with Scalloped Edging

This project was surprisingly easy and came together very quick.  It will make a great Christmas present for my niece, Mariella.  (Sssh!  Don't tell her!)


I followed the Child 'Coming Home' Poncho pattern from Lion Brand Yarns.  Side note: You'll need to create an account and sign-in to access this pattern.

My stitches tend to be a little tight, so I followed the size 7-8 pattern and used a size K crochet hook to be sure to create the right size for my niece.


For the body, I used a pink/green blend yarn called Pink Camo by Red Heart Super Saver (2 skeins, 244 yards).  For the collar, I happened to have some leftover Red Heart SuperSaver in Perfect Pink which matched perfectly.


I'm really happy with the finished product and definitely plan to use this pattern again and again!  This size 7 pattern measures as follows:  25 inches wide, 19 inches long, and 16-inch neck hole (stretches wider).


Hope you're feeling inspired to tackle your next crochet project.  Happy stitching!

Jilliane


Are you on Pinterest?  Follow my latest handiwork or crochet inspiration board!  

Flower Headband for Newborn

This adorable headband is for my best friend's first child, Emma Kate, who is due any day now!  I'm so proud to say that the headband will be worn in her newborn pictures, along with the Cascading Pink Ripple Stitch Blanket that I made for her earlier this year.


Step 1:  Making the flowers
First, I made each of the flowers, following Alli Crafts' Baby Headband pattern and using a size G crochet hook.

Step 2:  Making the headband & attaching the flowers
Next, I started the actual headband which is just a chain stitch (still using the size G crochet hook).  Once the chain was 6 inches long, I attached the first flower by inserting the crochet hook onto a loop on the back of the flower and making a slip stitch.  Then, I made 2-3 chain stitches to reach the other side end of the flower. Next, I grabbed another loop on the back of the flower and made a second slip stitch. After that, I made 4-5 chains to create space between the flowers and repeated the process for the next two flowers.  After the third flower, I continued to add onto the chain for another 6 inches.

Side note:  I read that a typical newborn headband is 10-12 inches. I made mine about 16 inches long so that it can be tied in a bow to fit just right.

Step 3: Sewing on the beads (optional)
Finally, I used a sewing needle and thread to sew 5 translucent pink beads onto the middle flower.


This was a very quick project and there's a lot of room for creativity.

Hope you're feeling inspired... Happy stitching!

Jilliane


Update:  Check out Emma Kate's newborn  photos by Kelly Long Photography.  Her headband goes so well with the Cascading Pink Ripple Blanket.


Update:  Emma's little sister, Brynn Ann was born on April 20.  This adorable little copy-cat wore her sister's headband in her newborn photos, too!


Are you on Pinterest?  Follow my latest handiwork or crochet inspiration board!  

Sunday, November 10, 2013

Fall Scarf, Tunisian Stitch and Crocodile Stitch

I am so pleased with how this scarf turned out and excited to see my mom's reaction when I give it to her!


My inspiration started with this gorgeous Fleurette Scarf Pattern.  I love the contrast of the simple Tunisian stitch complemented with the fluffy fleurettes on each end of the scarf.  I'm not one to buy crochet patterns so, of course, I decided to re-imagine my own version of it.

To achieve this look, I paired the Tunisian stitch with the crocodile stitch.  You can learn how to do each stitch here:
- Tunisian stitch
- Crocodile stitch

I used a standard afghan hook and one entire skein of Red Heart Super Saver (244 yards) in a beautiful blend of fall colors which was appropriately named "Fall."


Helpful tip:  While practicing the crocodile stitch, I figured out that the foundation chain should be made in increments of six.  Every six chains will give you a pair of double crochet stitches which are called "ladder rungs" in the tutorial.  Each pair of ladder rungs will become one full shell. 

For my scarf, I started with a chain of 18 to create 3 shells in the first row.  The crocodile stitch creates a layered pattern, so the scarf alternates between 3 shells and 2 shells for a total of six rows.


After the six rows of crocodile shells, I switched right to the Tunisian stitch without knotting or cutting the yarn.  Instead of creating another foundation row of double crochet stitches for crocodile shells, I began collecting loops onto the afghan hook.  Altogether, I collected 18 loops-- the same as my foundation chain.  If you're wondering where exactly to stitch,  I made two single crochet stitches into each space (where the double crochet stitches were made earlier in the pattern), plus I made two slip stitches between each of those (making sure to pass through yarn from both layers to help it lay flat). 

Next, I made the Tunisian stitch for the body of the scarf.  Sorry-- I lost track of how many rows I made.  Something I really love about the Tunisian stitch is that the front and back look completely different!

Front

Back

Connecting the second crocodile section proved to be more challenging than I expected.  After a lot of experimenting, here's what I did:

  • After the last Tunisian row, I created a crocodile-style foundation row which involved making five pairs of ladder rungs (two double crochet stitches in the same space, followed by two chains and three empty spaces... repeat until end of row).  At the end of the row, I knotted off and cut the yarn.

  • Next, I made a chain of 18 to begin the second crocodile section and continued like before for a total of 5 rows of crocodile shells.  For the sixth and final row of crocodile shells, I wrapped the stitches around the ladder rungs at the end of the scarf body that I made earlier. 

  • Finally, to make the stitch transition on this end of the scarf look identical to the first one, I finished off with two crochet stitches into each space (the same place as before), along with one slip stitch in between these pairs.  All of these stitches were made from the backside of the scarf which felt very awkward but looked better (I tried it from the front a few times, but it came out too thick and didn't look like the other end of the scarf).

Finished at last!


I hope these notes made sense.  If you're trying to replicate this pattern, please feel free to ask questions.  The scarf came out to be 58 inches long and about 6 inches wide.

Happy stitching!

Jilliane


Are you on Pinterest?  Follow my latest handiwork or crochet inspiration board!  

Saturday, November 2, 2013

Granny Square Baby Blanket with Scallop Edging

This blanket was fun to make and was a gift to a second-cousin, Shalaney, who is the big sister to the recipient of the Striped Baby Boy Blanket, actually!


I was inspired by the look of the granny square stitch with scalloped edging that I saw on Craftmumship's blog (and I'm definitely feeling inspired by her kid's poncho tutorial... adding it to my to-do list!).


For this project, I used a size K crochet hook and the following yarn:
- Red Heart Super Saver, Monet (3 skeins - 244 yards)
- Red Heart Super Saver, Orchid (very little)


As I have in past projects, I followed the tutorial for Lisa's Granny Square Afghan Crochet Pattern. Altogether, I crocheted 26 rounds of the granny square stitch.


After that, I switched to the solid purple yarn and crocheted one round of single crochet stitch.  Then, I crocheted one round of shell edging.  For the scalloped edging, I followed these instructions for the small shell edging.


The blanket measures 30 inches by 30 inches, and is definitely one of my favorites!


I hope this gives you some inspiration for your own projects.  Happy stitching!

Jilliane


Are you on Pinterest?  Follow my latest handiwork or crochet inspiration board!  

Thick Striped Baby Blanket

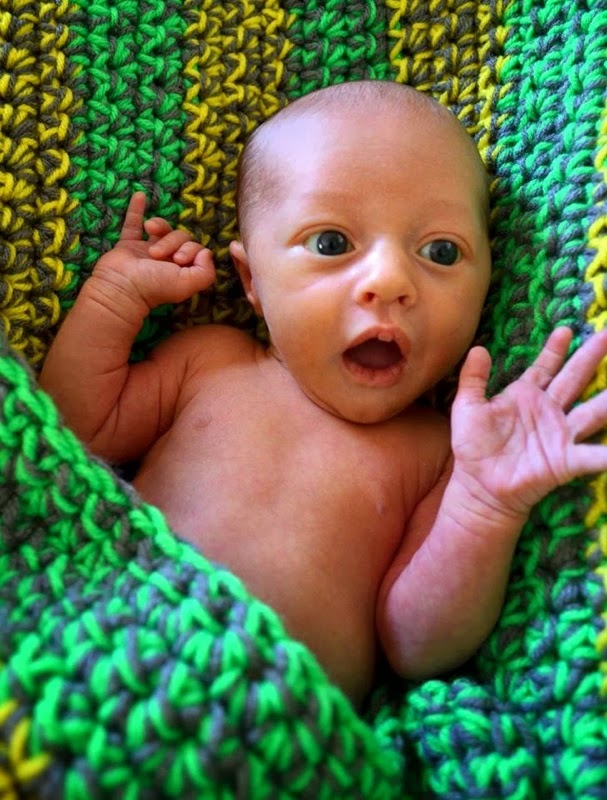
This blanket was a gift for my cousin's son, Seamus, and I'm really happy with how it turned out.


To make a blanket like this, the Chunky Crochet Baby Blanket Tutorial provides easy-to-follow instructions. As I've mentioned before, my favorite thing about this pattern is how creative you can be.  You can use three colors like I did with the Thick & Quick Baby Blanket or use two colors like I did with the Pittsburgh Steelers Kid's Scarves.


For this project, I decided to try a two color variation but with stripes.  The colors were inspired by my cousin's father who passed away last spring-- one of Uncle Dennis's favorite things was John Deere tractors.

For yarn, I used:
- Red Heart with Love, Pewter (1-1/2 skeins, 370 yards each)
- Red Heart Super Saver, Glowworm (1 skein, 364 yards)
- Red Heart Super Saver, Bright Yellow (1 skein, 364 yards)


To achieve the striped pattern, I used a size M crochet hook and crocheted six rows of single crochet stitches with gray and green yarn. When I got to the end of the sixth row, I snipped the green yarn.  Then, I tied the green and yellow yarns together and continued with six rows of gray and yellow.  I continued switching back and forth between green/gray and yellow/gray.

The blanket measures approximately 29 inches by 35 inches, and would be great for tummy-time or even as a crib blanket.


I hope this gives you some new ideas and inspiration for using this pattern.  See-- the possibilities are endless!  Happy stitching!

Jilliane


Update:  Seamus Theodore was born on December 9 and he's adorable!


Are you on Pinterest?  Follow my latest handiwork or crochet inspiration board!  

Sunday, October 27, 2013

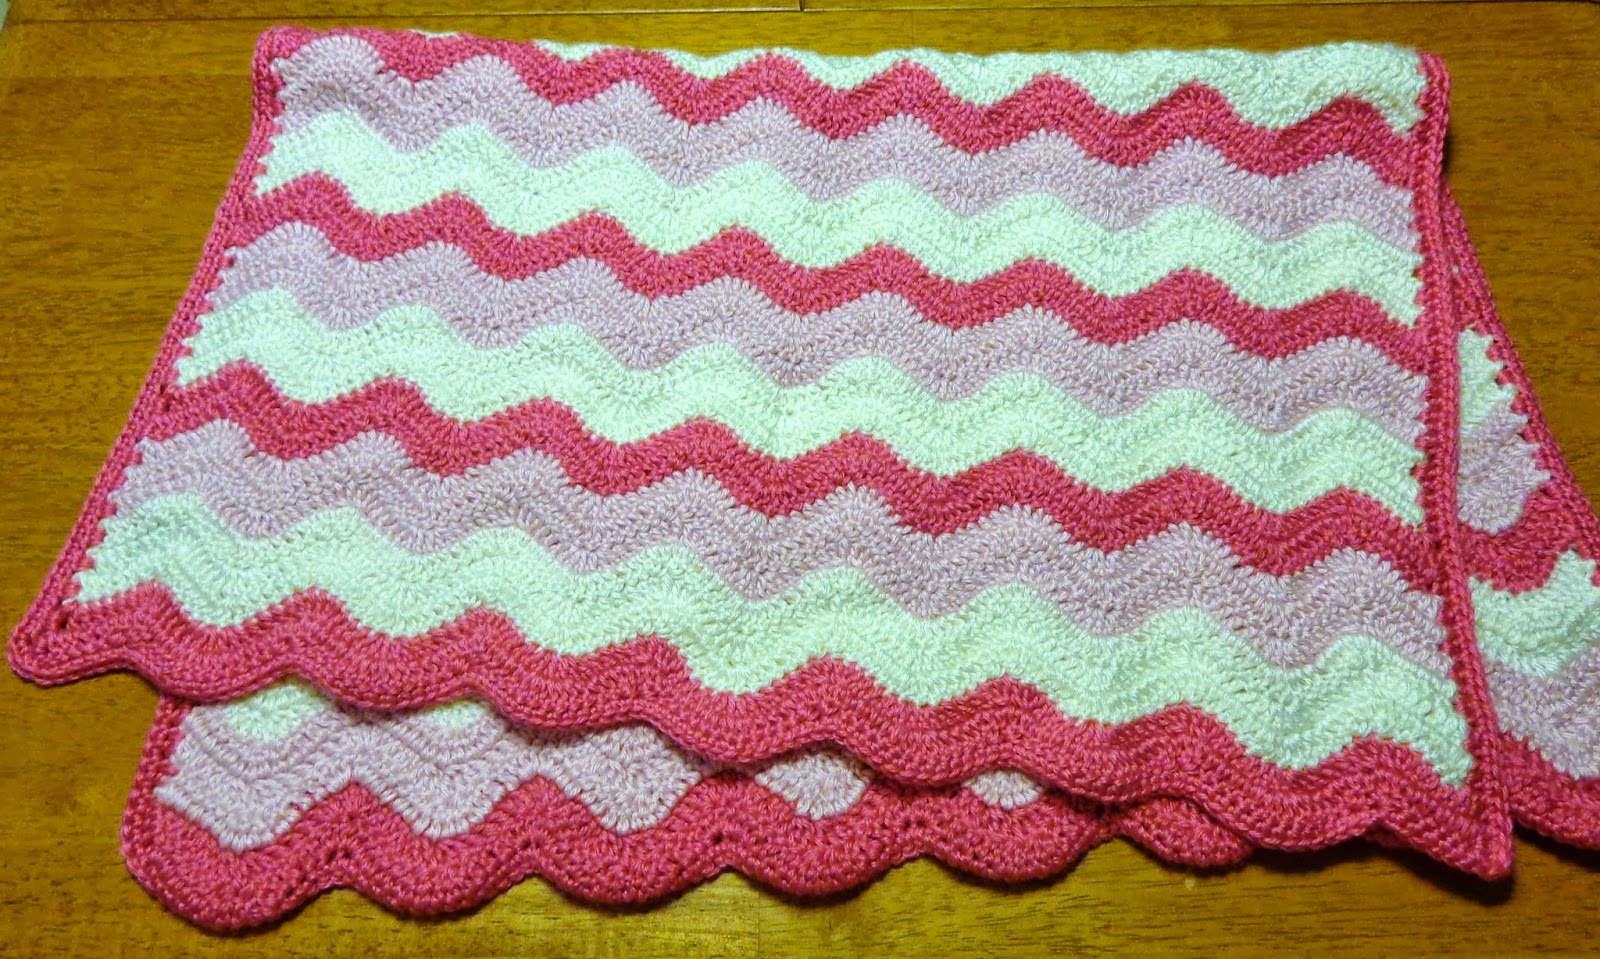
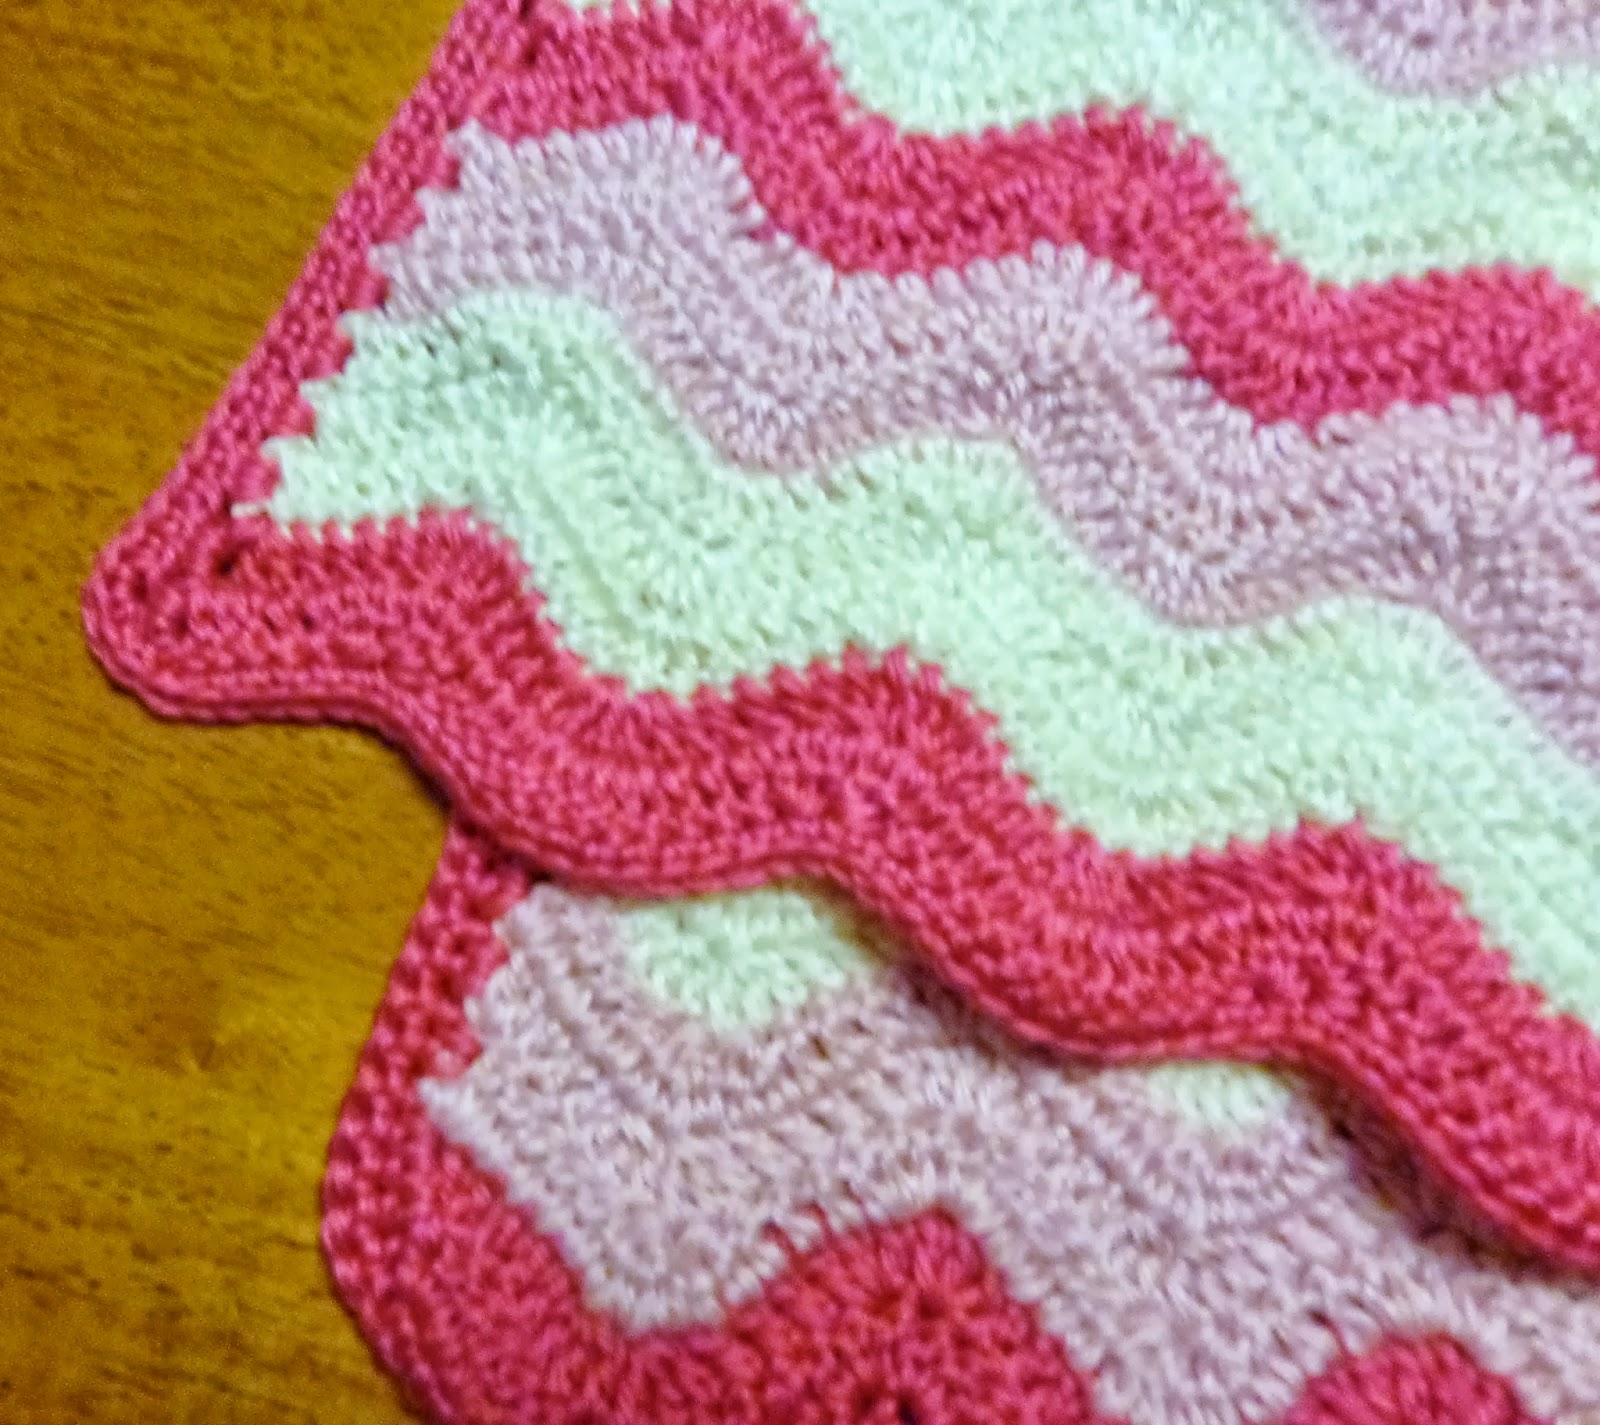
Cascading Pink Ripple Stitch Baby Blanket

I was so excited to work on this project-- it was a baby shower gift for Emma Kate, the first child of my best friend, Erin and her husband, Brad!

My initial inspiration came from the chevron pattern I found on Happily Ever After's blog, and the color scheme was an imitation of Ravelry's Cascading Ripple pattern. Most importantly, I learned how to crochet the ripple/wave stitch from Crochet Crowd's video tutorial.


For this blanket, I used a size G crochet hook and the following yarn:
- Caron Simply Soft, Watermelon (315 yards)
- Caron Simply Soft, Soft Pink (315 yards)
- Caron Simply Soft, Off White (315 yards)

To achieve the cascading color effect, my pattern was 2 rows of hot pink, 3 rows of light pink, and 3 rows of cream.  Finally, I ended with two rows of hot pink to achieve a "framed" look.


Once I finished the ripple rows, I decided to edge the blanket with a hot pink border.  I wasn't quite sure how to go about it on a ripple stitch, but found some direction with Sedruola Maruska's instructional video. After a little experimenting, the pattern for my edging involved crocheting two half doubles into the opening at the end of each ripple row, which I did on both long sides of the blanket.


After that, I finished the edging by crocheting a single crochet stitch around the entire blanket.  Side note:  I started and ended in the "nook" of one of the ripples, because it seemed like a better hiding place for the knot.


After all was said and done, I still ended up with a small ball of leftover yarn in each color, and the blanket measured 24 inches wide by 32 inches long.


I hope this gives you some inspiration... Happy stitching!

Jilliane


Update:  Check out Emma Kate's adorable newborn photos by Kelly Long Photography.  The blanket and Flower Headband go so well together!


Are you on Pinterest?  Follow my latest handiwork or crochet inspiration board!