Showing posts with label ripple stitch. Show all posts

Sunday, December 7, 2014

Winter Blues Chevron Cowl

This super-cute cowl will be a gift in my family's Christmas game-- recipient TBA!


For this cowl, I used a size "I" crochet hook with the following yarn:
- Red Heart Super Saver, Turqua
- Red Heart Super Saver, Grey Heather
- Red Heart Super Saver, Icelandic

As for the pattern of colors-- it's 2 rows of grey, 3 rows of turquoise, 2 rows of grey, and then lots of rows of the blue blend.

I closely followed the Winter Waves Chevron Cowl pattern by Cre8tion Crochet.  One variation right off the bat-- I started with a chain of 34 only.  Also, I inserted the crochet hook into the back loops only (often abbreviated as BLO in crochet patterns).  I'm really glad I did this-- it created a neat ribbed look!


To finish, I did a whip stitch into the back loops only of last row and the front loops only of the first row to try to replicate the other rows.  It came out nearly perfect on one side and a little more noticeable on the other.  Regardless, I like how it turned out.


The cowl measures 26 inches around and 9 inches tall-- creating cozy layers and waves.

Hope you're feeling inspired to start your next crochet project!

Happy hooking,
Jilliane


Are you on Pinterest? Follow my latest handiwork or crochet inspiration board!  

Sunday, October 26, 2014

Ripple Stitch Beach Blanket

This blanket is the result of my niece's wild imagination.  Long story short, I inherited 30+ skeins of yarn from my Great Grandma Bolt's collection and my niece dreamed up the idea of beach-themed blanket.

Coolest thing about this project?  My nieces are cuddling up with a blanket crocheted by their aunt and made of yarn picked out by their great-great-grandmother!

My imaginative niece, Mariella

I used a size "G" crochet hook and many colors of scrap yarn.  The stitch is the Large Ripple Crochet Pattern by Daisy Cottage Designs and includes easy-to-follow instructions.

Because I was working with scrap yarn, I changed colors very often.  To keep it smooth and hidden, I used a technique called the Russian Join.  Easy peasy!

Mariella with photo bomber / little sister, Laurina

I'm realizing now that I forgot to measure this blanket but I'm going to estimate that it's close to 40 inches wide and 30 inches tall.

Hope you're feeling inspired for your next project... Happy hooking!

Jilliane


Are you on Pinterest?  Follow my latest handiwork or crochet inspiration board!  

Sunday, December 22, 2013

Vintage Fan Ripple Stitch Baby Blanket

This blanket is a gift for a cousin and his wife who are expecting their second child in March-- how exciting!


For this blanket, I was inspired by a beautiful, multi-colored blanket that I saw on Chiaki Creates. Thankfully, the blogger included a link to the original pattern from Ravelry called the Vintage Fan Ripple Stitch pattern.

I used a size H crochet hook.  For yarn, I used one skein each of Red Heart Super Saver in Soft White and Turqua-- 364 yards per skein.


This pattern begins with a chain in multiples of 9, plus 1 extra chain.  For every 9 chains, you will get 1 fan. I started with a chain of 127 to make this blanket 14 fans wide.

The stitch is very unique yet easy to follow.  I'll warn you, though, it's not one of those "mindless" stitches-- you'll be counting and paying attention the whole time.  Something else interesting about this pattern:  because the stitches are made through the back loops only, it creates a slightly different look on each side of the blanket.

Front


Back

The pattern involves creating 3 ripple rows followed by 1 fan row (what I will call a "set"), and then repeating these steps.  To create the striped look, I switched colors after each set.  To finish, I continued with blue yarn to stitch the final 3 rows/edging.

Altogether, the blanket measures about 36 inches wide and 30 inches long.  It feels very soft and thick-- perfect for snuggling!


I hope this gives you some ideas for your next project.  Happy hooking!

Jilliane


Are you on Pinterest?  Follow my latest handiwork or crochet inspiration board!  

Ripple Stitch Baby Blanket

This blanket is a gift for one of my adorable second cousins, Aiden, who will soon be a big brother to the recipient of the Vintage Fan Ripple Stitch blanket.


I was inspired by the color pattern of two blankets-- one on Etsy and one on the Rainbow blog. Both involved varying the thickness of the stripes, which I thought was a pretty cool look.


I followed the Crochet Crowd's video tutorial for the wave/ripple stitch as I have for past projects, like the Cascading Pink Ripple Stitch Baby Blanket.


I used a size H crochet hook and the following yarns:
- Red Heart Super Saver, Aran (beige), 744 yards
- Red Heart with Love, Mango, 370 yards
- Red Heart with Love, Berry Red, 370 yards

The color pattern was as follows:  beige, mango, beige, mango, beige, berry, berry... and repeat.


To finish, I edged the blanket in beige.  This involved creating half double crochet stitches along both straight sides, followed by a row of single crochet stitches around the entire blanket.  As I did with the Cascading Pink Ripple Stitch Baby Blanket, I started the final row in the nook of a ripple to help hide it better.


This blanket turned out really cute and measures 45 inches by 36 inches-- a great size for a toddler.

I hope this gives you some inspiration... Happy hooking!

Jilliane


Are you on Pinterest?  Follow my latest handiwork or crochet inspiration board!  

Sunday, October 27, 2013

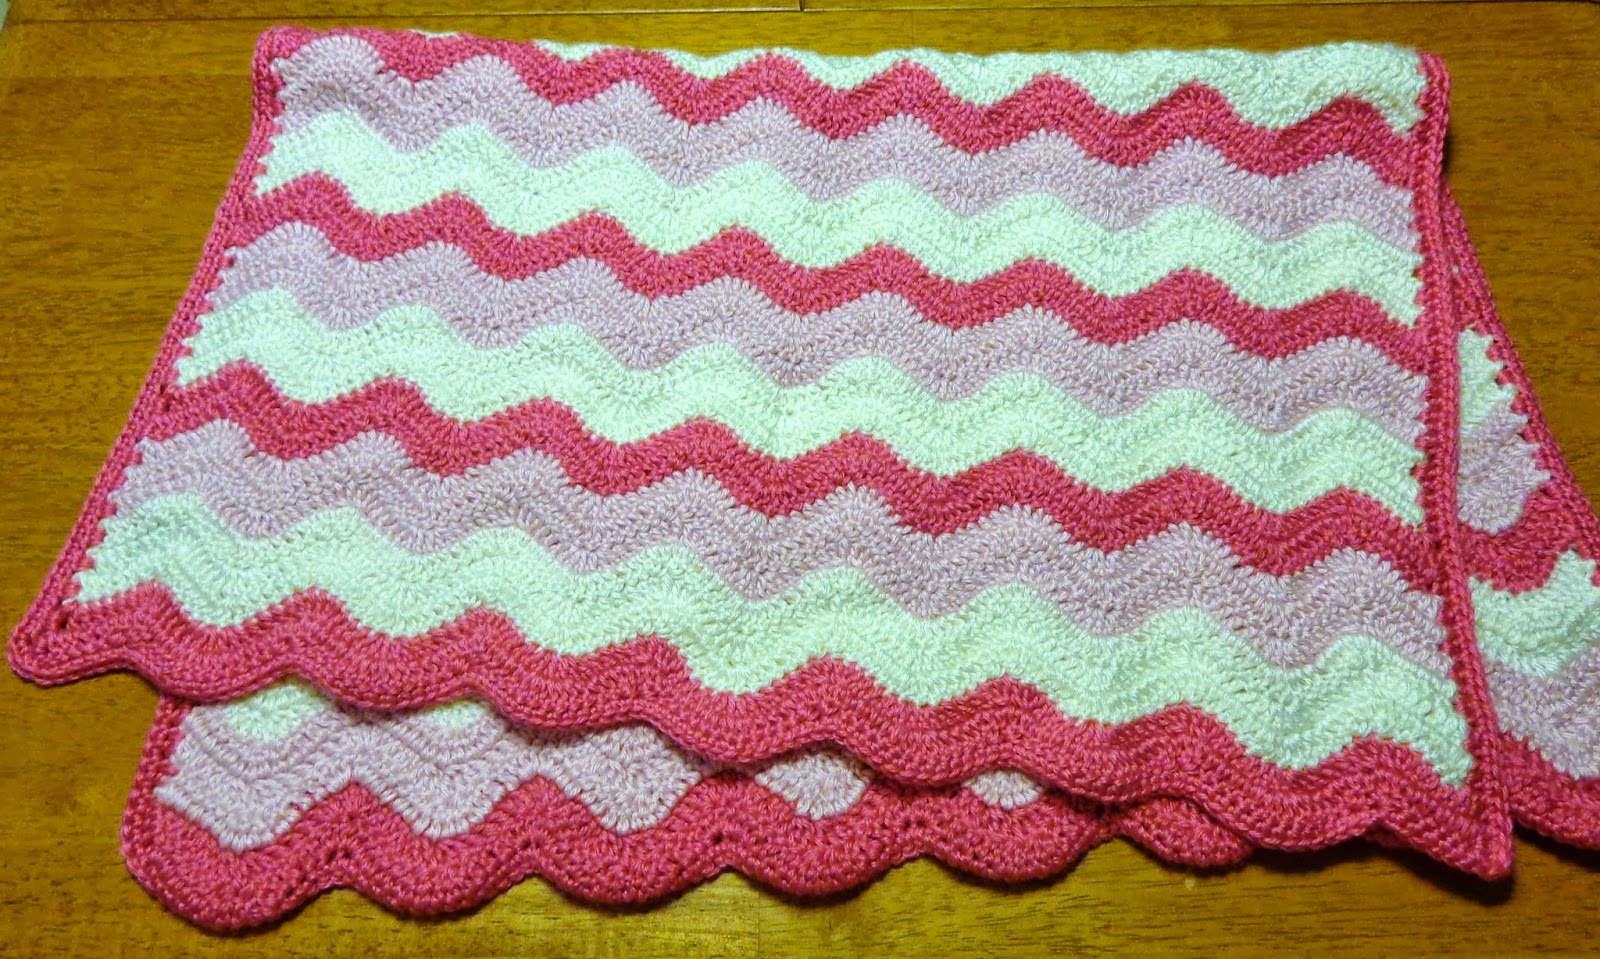
Cascading Pink Ripple Stitch Baby Blanket

I was so excited to work on this project-- it was a baby shower gift for Emma Kate, the first child of my best friend, Erin and her husband, Brad!

My initial inspiration came from the chevron pattern I found on Happily Ever After's blog, and the color scheme was an imitation of Ravelry's Cascading Ripple pattern. Most importantly, I learned how to crochet the ripple/wave stitch from Crochet Crowd's video tutorial.


For this blanket, I used a size G crochet hook and the following yarn:
- Caron Simply Soft, Watermelon (315 yards)
- Caron Simply Soft, Soft Pink (315 yards)
- Caron Simply Soft, Off White (315 yards)

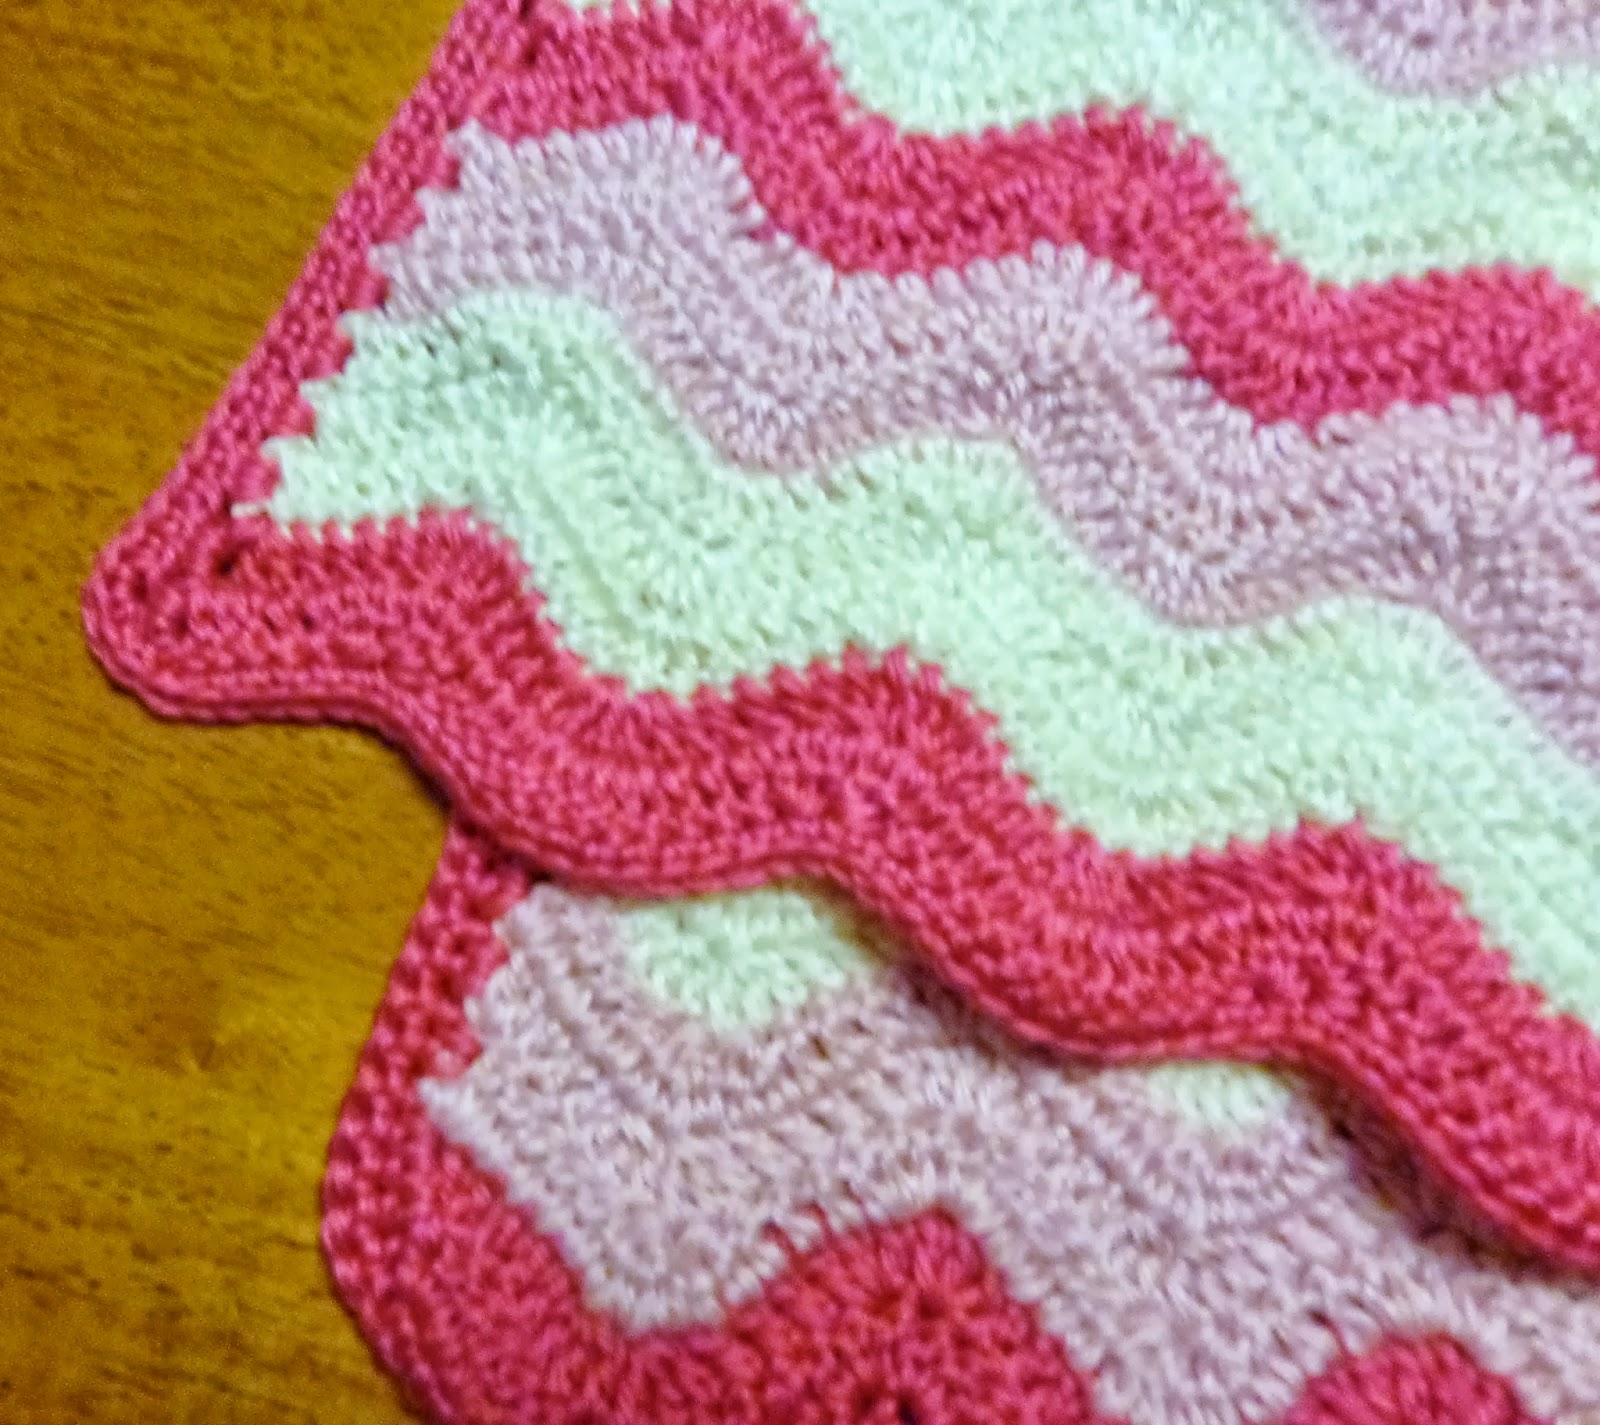
To achieve the cascading color effect, my pattern was 2 rows of hot pink, 3 rows of light pink, and 3 rows of cream.  Finally, I ended with two rows of hot pink to achieve a "framed" look.


Once I finished the ripple rows, I decided to edge the blanket with a hot pink border.  I wasn't quite sure how to go about it on a ripple stitch, but found some direction with Sedruola Maruska's instructional video. After a little experimenting, the pattern for my edging involved crocheting two half doubles into the opening at the end of each ripple row, which I did on both long sides of the blanket.


After that, I finished the edging by crocheting a single crochet stitch around the entire blanket.  Side note:  I started and ended in the "nook" of one of the ripples, because it seemed like a better hiding place for the knot.


After all was said and done, I still ended up with a small ball of leftover yarn in each color, and the blanket measured 24 inches wide by 32 inches long.


I hope this gives you some inspiration... Happy stitching!

Jilliane


Update:  Check out Emma Kate's adorable newborn photos by Kelly Long Photography.  The blanket and Flower Headband go so well together!


Are you on Pinterest?  Follow my latest handiwork or crochet inspiration board!