Showing posts with label granny square. Show all posts

Saturday, December 31, 2016

Diagonal Granny Stripe Baby Blanket & Striped Baby Hat

This matching blanket and hat set were made back in July 2016 for my cousin's second child, Walden.  (Yes, I'm still getting caught up on backlogged blog posts.)


For both projects, I used a size G or H crochet hook.  The main yarn is Red Heart Gumdrop in Citron, and the stripe and border is Snuggly Wuggly by Loops and Threads in Soft Gray.


For the blanket, I followed the Diagonal Granny Stripe Afghan tutorial by Easy Crochet Patterns.  To achieve the striped pattern, I crocheted six rows of Citron and two rows of Soft Gray.  Secret:  I didn't cut the yarn with each color change.  Instead, I simply ran it loosely along the edge to where I needed it next, and then covered it up when I did the shell edging.  The blanket came out to be 30 by 30 inches. 


For the hat, I followed Oombawka Design's pattern for a Double Crochet Beanie in the Newborn size. I've had good luck with this pattern in the past (check out my Earthy Striped Baby Hat).  My secret is to use Cr8tion Crochet's instructions for seamless crochet stitches. The hat came out to be 9 inches around and 4-1/2 inches tall.

I hope you've enjoyed this post and found some new ideas for your next project.

Happy hooking in 2017,
Jilliane


Are you on Pinterest?  Follow my latest handiwork or crochet inspiration board!  

Sunday, February 15, 2015

Striped Granny Square Baby Blanket with Picot Edging

I am so very excited to give this blanket as a gift to my best friend, Erin who's due to welcome another daughter on May 9.  The blanket and headband set I made for Erin's oldest daughter, Emma Kate went over so well that it's a tradition now, I suppose.


I was inspired by the stripe pattern of this granny square blanket on Daisy Cottage Design.  My color scheme started with 3 rows of cream followed by 2 rows each alternating in cream and purple together, cream alone, cream and pink together, and cream alone.


To finish, I crocheted two rows of cream followed by a row of this simple picot edging by Bunny Mummy.


For materials, I used a size "I" crochet hook, Caron One Pound yarn in Off White, and a skein each of pink and purple yarn found at a local craft store.  I'm not sure how the packaging translates, so here's a picture instead:


I am enamored by the subtle sweetness of this blanket's colors and the whimsical touch of the edging. To be honest, I am quite excited to see Erin's little bundle wrapped up in this blanket with her matching hat!


The blanket measures 29 inches by 29 inches.  Hope this provides some inspiration for you next crochet project...

Happy hooking,
Jilliane


Update:  Brynn Ann was born on April 20th!
Here she is sporting her hat and blanket in photos by Kelly Long Photography.


Are you on Pinterest?  Follow my latest handiwork or crochet inspiration board!  

Thursday, July 3, 2014

Rainbow Granny Square Blanket with Flower & Fringe

After seeing her sister's new blanket with interlocking rings, my niece, Mariella put in a request for a blanket with "lots of colors!  And fringe!  And a flower!"  And being the awesome aunt that I am, I said "yes," of course.


For this project, I used a size G crochet hook and the following yarns:
- Lion Brand Homespun, Mimosa - 2 skeins, 185 yards each
- Red Heart Super Saver, Aran - scrap

While beautiful, the texture of the Lion Brand Homespun yarn can be a bit tricky to work with-- the layers pull apart and it can be hard to see and count stitches.  So, I chose the granny square pattern for its simplicity.  As I have for past projects, I continued to follow the clear and easy instructions for Lisa's granny square crochet pattern.  After 19 rounds of the granny square pattern, the blanket measured 24 inches by 24 inches, and there was only a small scrap of the blended yarn remaining.


For the flower applique, I followed the 3-part video tutorial by epicabundance.  As you can see in the picture, I used the beige yarn for the first and third layers, and the last bit of blended yarn for the second layer.  Once the flower was finished, I secured it to the blanket using the tail of the blended yarn to help it blend in seamlessly.


After that, the fringe was the only step left to do.  I used the beige yarn again, cutting a lot of 7-inch long strands and looping three at a time through the spaces on the final row of granny squares.  Fringe included, the blanket measures 30 inches by 30 inches.


This was a very simple project with a few extra touches to make it special.

Hope you're feeling inspired for your next project... Happy hooking!

Jilliane


Are you on Pinterest?  Follow my latest handiwork or crochet inspiration board!  

Sunday, December 22, 2013

Never-Ending Granny Square Blanket

This was a fun project for our niece, Isabella, who I hope will love to cuddle with her new blanket.


I followed The Crochet Crowd's video tutorial for the Never Ending Granny Square.  I used a size H crochet hook and 1-1/2 skeins each of following Red Heart Super Saver yarns:  Soft White, Perfect Pink, and Glowworm.


About 22 minutes into the video tutorial, the instructor talks about splitting one of the shells.  For that shell, I decided to crochet four double crochet stitches, so that it wouldn't be noticeable that one of the double crochets was covered up by the next color yarn.


For edging, I did a single crochet stitch all the way around the blanket.  I crocheted three single crochets into the top of each shell and one single crochet around the yarn in the spaces between shells.

Altogether, the blanket measures 38 inches by 37 inches.  As the video instructor said, this blanket isn't perfectly square because of the "never-ending" aspect of the pattern.  If you study it real hard, the center looks a little cockeyed but honestly-- it's not too noticeable.


Hope this gives you some inspiration for a new project.  Happy hooking!


Jilliane


Are you on Pinterest?  Follow my latest handiwork or crochet inspiration board!  

Saturday, November 2, 2013

Granny Square Baby Blanket with Scallop Edging

This blanket was fun to make and was a gift to a second-cousin, Shalaney, who is the big sister to the recipient of the Striped Baby Boy Blanket, actually!


I was inspired by the look of the granny square stitch with scalloped edging that I saw on Craftmumship's blog (and I'm definitely feeling inspired by her kid's poncho tutorial... adding it to my to-do list!).


For this project, I used a size K crochet hook and the following yarn:
- Red Heart Super Saver, Monet (3 skeins - 244 yards)
- Red Heart Super Saver, Orchid (very little)


As I have in past projects, I followed the tutorial for Lisa's Granny Square Afghan Crochet Pattern. Altogether, I crocheted 26 rounds of the granny square stitch.


After that, I switched to the solid purple yarn and crocheted one round of single crochet stitch.  Then, I crocheted one round of shell edging.  For the scalloped edging, I followed these instructions for the small shell edging.


The blanket measures 30 inches by 30 inches, and is definitely one of my favorites!


I hope this gives you some inspiration for your own projects.  Happy stitching!

Jilliane


Are you on Pinterest?  Follow my latest handiwork or crochet inspiration board!  

Tuesday, October 15, 2013

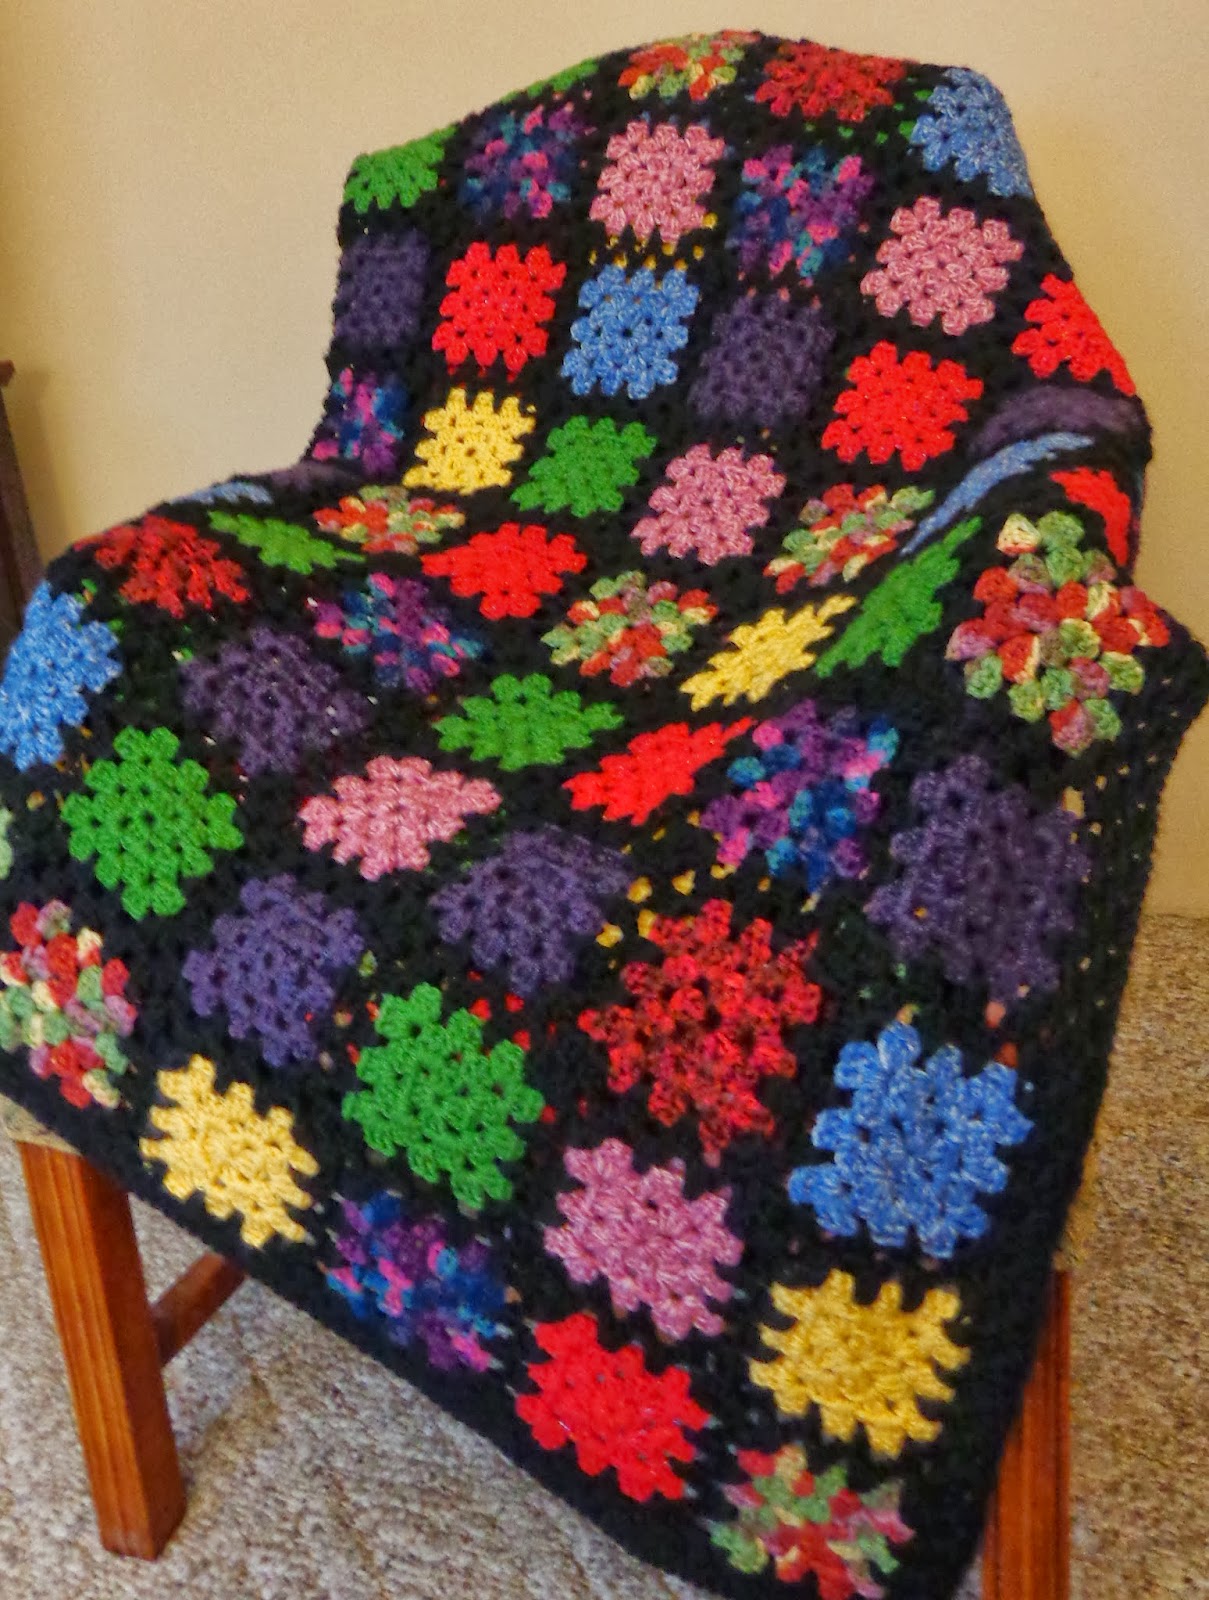
Color-Block Granny Square Blanket

I have to say that I'm really really proud of my granny square blanket. It is my biggest crochet project, and took me most of March and April to make it-- sometimes I'm still awestruck that I finished it!  


My inspiration to create multi-colored squares framed in black came from this image-- the black outline really makes the colors pop!  From there, I learned how to create granny squares using instructions from Lisa's Granny Square Afghan Pattern


I used about 10 different yarns for the granny squares.  I started with scraps from previous projects and then purchased a few new skeins as my vision for the project grew.  A few of my yarns were a little thinner than the others, and I ended up stitching a single crochet stitch border around those squares in order to make them the same size as the others. This approach worked just fine, and it's not noticeable at all. For the black border, and I used about 2 skeins of Caron Simply Soft.  


I ended up making 140+ squares.  Before I started connecting squares, I laid out all of them on my kitchen table and played around with the color placement and measurements until I really liked it.  The final product was 10 squares by 14 squares.  


I spent a lot of time researching and deciding how to connect all of my squares. Knot Your Nana's Crochet gave me a lot of ideas.  Eventually I chose the Granny Join Stitch, because it looked very similar to the granny squares and I thought the blanket was busy enough with so many colors.  For the Granny Join Stitch, I followed the tutorial on Carina's Craftblog, and I'm really happy with the outcome.  


Connecting the squares is a loooong process and staying organized was important so I didn't mess up the color pattern I planned out. Basically, I started on the far right row and connected all of the squares into a long strip of 14 squares (using the Granny Join Stitch). Then, I repeated this process for the second row. Then I used the same Granny Join Stitch to connect these two long strips.  Each time I completed another strip/row, I connected it to the other completed rows. 


Side note:  You could make all of your strips first and then connect them-- that would work, too. For me, it was A) motivating to see the blanket "growing" and B) more interesting to switch back and forth between long vertical stitches and short horizontal stitches. 


Once all of the strips were connected, I crocheted a border using the Granny Square Stitch I mentioned previously (Lisa's Granny Square Afghan pattern).  I used the instructions for creating additional rows, and my border is 3 rows of this stitch.  


I hope this gives you some inspiration... Happy stitching!


Jilliane


Are you on Pinterest?  Follow my latest handiwork or crochet inspiration board!